Monday, March 17, 2014

2014 A&S Faire, "Day 3"

Good progress on the panel. I hadn't realized last week was going to include three 18-hour days. Im way behind and may use a PTO day or two this week to catch up. Some thoughts:

Moving around the table
I've got my "table" on an actual table. It's a lot more difficult to get a good cutting/viewing angle when you can't manipulate the paper cartoon or walk around the table. Doing this on a freestanding table would be more interesting.

Also, glass shards get stuck in the wood. That was a delightful surprise! Brush away all you want, you're probably going to need tweezers.

Grozing
Using a grozing iron kicks up glass dust. My research (as a nonmedical professional!) indicates silicosis is only a factor after prolonged exposure to large amounts of dust. I still might get a cheapy medical mask, I felt like my nose was a bit irritated.

Hot dividing irons
When I'm done with my dividing iron for an extended period, I quench the end in the goblet of water on my bench. Then I set it on a chunk of framing stock scrap that serves as an excellent stand, protecting my table or the pattern table.


Be careful where you set the rod. You can see the burned spot on the table in the picture above where I underestimated "black hot" iron. Also, the burns near my right elbow....

Cleanliness of glass
A rather subjective observation, but it seems like this glass cuts so much cleaner. Harder to make shelves in it when cutting straight lines. Very nice to work with!

Monday, March 10, 2014

2014 A&S Faire: Day 2

Today I learned I was way off base about the use of the grozing iron. I'm a little embarrassed to write this, but this blog is a place for me to track my findings, sources, projects, etc. I know others read it, and I link others here when something I've found may help them... but at its core it's my own record keeping.  So, today I learned that the grozing iron is not grozing pliers in a different shape.

It wasn't just the name that led me to think this, but a slight underestimation of the tool's capabilities. I understand and understood that the dividing iron acted as a glass cutter and running pliers in one; it creates a score that runs pretty much simultaneously. I thought that the grozing iron must be there for lines that don't quite break, or for glass that is leftover on a breakline. I tested the tool that way, running a score and confirming that, yes, it breaks the score.

However, that's not what gives period glass it's distinctive chewed appearance, and not why the tool is described as nibbling glass. Tonight I cut a few pieces of my panel with the dividing iron and noticed I could only cut some general shapes out, not the exact pieces I planned. I reviewed some notes, sources, and reconstructions from a tourist attraction in the UK and suddenly it clicked.

You are literally chipping away little bits of glass with the grozing iron. It uses brute force to chew bites off the glass, a description that suddenly seems a lot more on the nose when you are looking at all these tiny semi-circles taken out of an edge. I was also surprised to find that the tool is quite versatile. I can tear off large chunks indiscriminately, and I can also scrape slivers off. 

So, today I cut most of one blue/gold border. According to the museum notes these panels were silver stained. It looks rather even and its the entire piece in all of these borders, so I assumed it would be pot metal yellow. I'm trusting the experts, however, that these were stained.

A grozed piece in place

The border, missing two pieces

The picture above shows a side effect of using a dividing iron; There is a lot of uncontrolled cutting and breakage. Unfortunately it is very difficult to get the blue GNA glass I'm using here, and the clear mouth blown is expensive. I don't think I'm going to be able to maintain my goal of extensive period cutting. I will use it whenever I can, but I'm already accepting the fact I will have to use my modern cutter in many places just to avoid wasting hundreds of dollars of glass, some of which I can't even replace if I have to.

I'm saving the little pieces on the corner of the table to potentially make a small batch of vitreous paint. I have a late period formula that calls for iron shavings, which I have on hand. It will make for a fun little experiment. I don't have to worry so much about incompatibility if I am using the same base glass... I hope!

A close up of a piece while I worked on it, showing the characteristic nibbles

All in all today I got a first true appreciation for the work of a medieval glazier. I am making a 1 square foot scaled down version of a segment that would have been 4 square feet. If I do the math, and if memory serves, the entire window would have been 36 square feet. It was one of 5 windows in that portion of the church. One of several dozen windows in that cathedral. 

And they made it with a hot iron rod and a bar with a notch in it, in essence.

Ho-ly { ..... }

The enormity of it boggles my mind. They could do so much with so little in the middle ages.


Sunday, March 9, 2014

2014 A&S Faire Project: Day 1

Now that I think I have all of my materials and tools gathered, it's time to get to work!

I will try to add notations and sources later. From my research, the glass artist worked from a "table" that was whitewashed, and the pattern drawn directly on it. There are financial records showing the glazier hiring artists to draw their pattern onto the table for them. I do have a sister-in-law who is a professional artist, but rather than bother her, I decided to trace the design I want onto the board. But, I wanted to do it in a period manner too.

The "creative" category of our faire criteria threw me for a while. Researching period practices, we can show that glaziers would reuse the same cutlines on a table for different windows. I have chosen a specific cutline from a grisaille window segment in a Norman catehdral. I'm going to paint it with a floral motif from a different contemporaneous grisaille in the same cathedral, and use a border inspired by a third. The end design should look like it could have come from the same time and place (and building!)

I started with a large board I had around the house. I white washed it and placed it on my dining table to begin working. It was inspected and improved by Scheherazade ("Zod"), my cat.


I placed my pattern onto the board, grabbed a pin from my sewing kit... and started poking it. Now, this method is not one I researched personally (my library is not focused on scribal arts) but was described to me by multiple highly-learned scribe friends. [See Lessons Learned, below, for a note on these pins!]


This was both more and less tedious than I expected. Right when I reached a point where I really thought unkind things, I also realized I was finished with the pin. It hurt my hand quite a bit, pushing that pin into wood. The thought occurred to me it might be easier to have a handmade pin like what Roana or Ercc makes. They are a bit larger and I suspect stronger. Sometimes this pin was bending more than I was comfortable with as I pushed. I imagined it snapping and going into my finger (been there, done that). Fortunately, it didn't.

The hole-y template

I then rubbed the leadlines-to-be with charcoal


As promised, the dots and charcoal were left behind on the board.


I then played connect-the dots...


The traced cutline looked a bit irregular. On further exam... the original panel was irregular. No problem there, then!

Now, I have a whitewashed board, a cutline on it, and my tools ready. I got excited, grabbed the glass, and got to work. Unfortunately, that was a mistake. The medieval procedure was to trace my desired cut line "with an emery point" before taking the dividing iron to it. I forgot that part and jumped right in with the iron. As a result, it didn't follow the path I needed. Rather than just waste the opportunity however, I grabbed my camera. Here is video I took of the dividing iron doing it's job. I did initially have to use a little bit of water to get it started, but after that it followed the heat well:

I removed the background nose of the "How It's Made" marathon and replaced it with something a little more.... on topic.

Before anyone asks, the white material on the rod is from absent-mindedly setting a blackhot iron onto the pattern table. It burned and picked up some paint.

Since I demonstrated the dividing iron on tape, I decided to do a quick video of the grozing iron too. I had a segment of glass that I scored but which was not cleanly broken. The grozing iron takes it right off.

[Edit: Movie deleted! I was an idiot! See the post that follows on Day 2, I kind of misunderstood how a grozing iron was supposed to work until I used it in production...]

I didn't have any clever music for this one, so you get 23 seconds of How It's Made.

Lessons Learned:

The wood used for the table can have an impact. This had hard bands that were difficult to push a pin into. Estelle de la Mer has informed me of a better alternative and provided a picture, of a handmade tool she uses for ruling in her scribal work:


Don't forget the emery point path! I shall find out today how different that makes the process.

As I already knew, a larger dividing iron will hold more heat and make this process easier with it's extended working time. That will be rectified later!


Making a hogs-bristle brush

I had some trouble when I tried making my first minever paint brush.

I researched it a bit more and discovered two things: The first set of quills I had purchased were mutants and had been cut short by the vendor and second, people working with quills usually soak them to make them softer.

Now, to be clear, in the directions on p. 40 of my copy of Cennini he doesn't say to soak the quills. His thread may have been stronger, his quills thinner-walled, or many other things. However it looks like fly-fishers and others using these quills today frequently soak them, so I gave that a try. That made the quills softer and suddenly able to take a bit of a "squeeze" that broke my thread with the first try. Not wanting to waste my precious supplies of stoat tails, I decided to try again using hogs-bristle (the other type of brush described by Cennini).


A feather from the first set (top) next to one from the second set. I hadn't realized the feather should have this chiseled tip the top one has. Comparatively the second set also have much more usable quill.

The process is pretty much exactly as described in the previous post. I have a pack of hog-bristle brushes that I bought for scrubs in my glass painting. I took an exceptionally large one for which I had a duplicate and took it apart to claim the bristles.

An interesting observation, the bristles have a "root" end. I'm not sure it's biolgically/cosmetically a "root" but one end will be thicker and stronger on a good bristle (I also don't know why these are bristles and not hairs, but I'm a glazier-turned-brushmaker not a biologist... yet). I found it important to try and line up the bristles so I knew which end was the thicker/stronger end.

I took my soaked quill and trimmed the very end off. I used a tapered stick "of other good wood" as Cennini calls for, and shoved the quill on as far as possible. I then grabbed a clump of bristles and shoved them in the other end. Cennini described sticking bristles/hairs in individually until you can't get any more of them. This is where it became a LOT easier to know which was the strong end, as that end wiggles in more easily.

This also makes some sense for retention purposes, I think. The portion of the bristles that is at the opening of the quill is somewhat thinner. You can sneak more bristles in. If you were to try and pull the bristles collectively, however, I think the thicker ends would jam and not come out in a clump.

I tied a knot with my waxed silk thread and could see the quill took the pressure a little better. My thread snapped, after I had gotten the knot tied. On a lark, taking a note from an old martial arts movie that "wet silk never breaks" (not true!) I soaked the thread. I continued tying another knot and doing a little wrapping (that was probably too loose). Its difficult to do all this with only two hands! Same thread, knot, wrapping on the other end to secure it to the stick.


The brush was a little wild, and as Cennini told me to, I trimmed it down a bit:


As a final step I dunked it back into water and made some practice strokes. I gently tried pulling the bristles and none came out. I wouldn't give them a serious tug, but I think this is a practical brush made exactly to the primary source's standards. We will see if it holds up to vitreous paint and silver stain, however!

When I teach my silver stain glass this Pennsic, I hope to give out small vials of stain. I'd love to make a dozen of these to give out too. It didn't take too long in the scheme of things and would be a nice touch!

Lessons Learned:

Hog bristles are much more clingy than stoat fur. When I dunked my bunches of bristles in water they immediately made a tight cluster. I had to work the fur with my fingers for a while to try and make a cohesive bundle. I think in general bristle brushes are going to be easier to make than stoat.

I'm not sure why soaking a hard protein-based quill makes it softer, but don't our fingernails do the same after a hot soak in the tub? Might be something to investigate when bored later.

I have typed and said Cennini's name so much lately I'm starting to feel bad that I have no idea how to pronounce it. Keh-nee-nee? Cheh-nee-nee? I highly doubt it's Sen-nee-nee. I'll need to figure that out before I teach and have to say it several times.

The Dremel Blacksmith - Making a grozing iron

We have a few different depictions of a grozing iron:

From a modern reconstruction (Images sourced from Corpus Vitrearum Medii Aevi) we have the following images, which are similar to a display set up by the Dean and Chapter of Canterbury:


From the 15th century or so, we have this coat of arms:


This seems to be the image we draw our charge from in the SCA. A handful of us, myself included, have grozing irons in arms and badges.

The point  is to provide a fulcrum for breaking glass, like modern running pliers and techniques.

I purchased a 3' length of flat stock at my local hardware store. I consulted with a blacksmith friend on my metal choices for this project and decided that, as the iron itself will never be an A&S entry, it was ok to use steel. Of course, I'm also using a drill and dremel so...

Some interesting facts for those of us who do not often work with metal. I was afraid of the shower of sparks I knew must happen. You see it whenever something is grinding on metal. I was assured they wouldn't hurt. They didn't! Granted these are smaller sparks than people working on "real" metal might get, but I barely noticed them, and I'm a wuss.

I've had my dremel kit for a while now. I've used it for many things, but never cutting metal. I wondered why they gave me so many cut-off wheels. Now I know, they are consumed in the cutting:


I used the dremel to cut about 10-11" off the stock. I then took the corners off and will use a bench grinder or file to give it a more rounded appearance. More on this below in "lessons learned"...


I used a normal drill with a metal bit to put the hole in. I will do this again on the other end, with a deeper hole, for somewhat deeper cuts.


The iron worked just fine. I scored a piece of glass and used the iron on the underside. I thought it would break off small chunks, the nibbling effect I expected, but it popped off the entire score. The end result looks like my modern running pliers, to my surprise.

Lessons Learned:

Well, certainly not much about medieval blacksmithing!

I took as my model the more heraldic style of grozing iron, or what I thought of as that. I pictured flat stock with a hole chiseled or punched out. I now realized this is probably a stylized design (shock! Imagine that!) and that the end of the tool should not be as thick as the charge is usually drawn. In terms of physics, however, it should be just fine. In fact, it WORKS just fine. In the future I will try to get a more proper one. Late period irons have been seen and depicted that are much like this,a notch out of an bar, however.... really, I am not overly worried about it right now.


Saturday, March 8, 2014

The Dremel Blacksmith - Making Dividing Irons

Again, I need a few tools for my A&S project. This spring I will have much more authentic ones made by a competent blacksmith, but for the moment it's me, my power tools, and metal stock from the hardware store.

From the descriptions in primary texts and from other recreators we have something like this:

Source lost, my apologies!

It needs a bit of a point or a chisel tip to give accurate transfer of heat to the glass. It needs to be of thicker stock, however, to hold heat long enough to work.

I initially created one out of 1/4" stock, and hand filed a point on it. It didn't work very well! It was too thin to hold heat for very long. I consulted with other SCA glassworkers and was tipped off that that was likely my problem. One friend explained she uses large square stock and uses the corner of the square as her point. I couldn't find solid square stock around me, and time is of the essence. Instead I bought round stock that was 3/4" thick. I looked at it, looked at my hand file, and witnesses may or may not have later described something akin to "whimpering."

These tools are not intended to be entries on their own. That was never the intention. So, with the assistance of a friend we ground a stubby point onto two rods to give them a chisel tip without making the contact point too far away from the bulky, heat-holding chunk:

Spaarks. Pretty spaarks!

My two dividing irons. One is longer for fireplace/brazier work. One is short for torch heating at demos.

It does successfully work. It can be a tad hard to control, but it works. Its a pretty neat feeling when it does! I created two irons. One is just short of 1 foot long, and the other just over 2 feet (3' stock originally). I did this because iron/steel is a surprisingly poor conductor of heat. On the foot-long iron one end can be room temperature and the other red hot. The short one is intended for heating in a blow torch, which is useful at demos and events where an open fire is not an option. It also fits into a small round case I have for my period hand tools. The longer one will sit in a fireplace or brazier of coals.

A shot of an iron at work:


Edit: You can find VIDEO of the iron at work at the end of a later post found here.


Monday, March 3, 2014

Making a "minever" brush, pt. 1

[Edit, 3/3 12:45 PM. I just got a package that changed some of my information on this brush. Details tonight! In short, the quills I had were chopped before I bought them. Also, the squeezing of quills! Edit-of-the-Edit, the update can be found here!]

This was a bit off-putting.

I am, mundanely, a computer geek. I don't hunt for my food. I have two cats and a beagle. I like animals. I'm not naive, I know what tasty bacon comes from and I appreciate when hunter friends share venison with me. But I know I probably couldn't field dress an animal unless my survival depended on it. So, this ended up being a slight bit sad for me, handling little furry tails.

Cennini is the earliest primary source I have on actually making paintbrushes. Consulting a friendly C&I Laurel suggested this was fine. She said that before him no one probably thought writing it down was necessary because of the normal apprenticeship process.

The short version he detailed is you use minever fur and a tapered stick and join them using a quill as the ferrule. They are joined by some thread lashing.

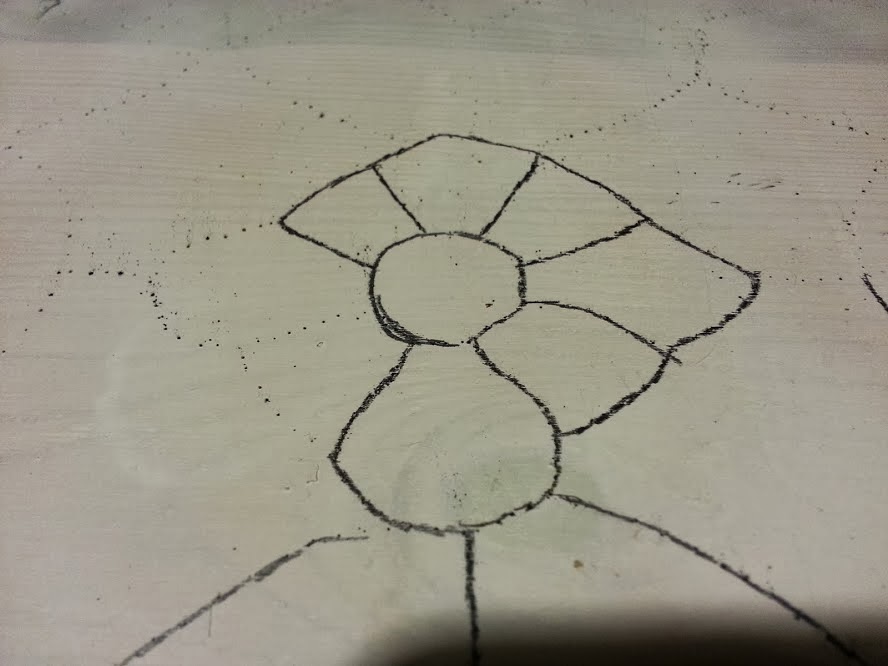
He wrote that you must take the tails of minever (stoats) and remove the ends, which have the longest fur. Then take the fur from the middle. Wet them in a goblet of clean water and press them into bunches. Then you take quills of varying sizes, vulture, goose, dove, and so on. Put a bunch of fur of the appropriate size into the quill, and wrap it with silk thread*. Then, insert a small stick of wood* into the other end, and again lash it on with the thread. This yields a minever brush that he says can be trimmed into a number of shapes appropriate for different jobs.

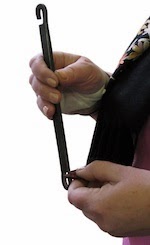
I had to research what a minever was to understand it was a stoat. I managed to find someone selling stoat tails online, who had three of them. None of the pictures of stoats or tails had a scale reference, so I pictured something large, like a ferret or racoon tail. I was a bit surprised:

Stoat tails in a pretty standard adult male hand.

Now I see why he talked about using the tails of five or six of them for a large brush.... Heralds, do these look familiar at all? The winter coat of the stoat is called ermine. I can't imagine how many tails it took to trim a garment!

With only three tails to work with, I won't be making any large brushes. I also won't be painting any large murals, so I don't feel particularly worried about this. I plucked out a lot of the fur from the ends and middle of one tail. Wet the fur and pressed it into clumps on my table.

 Loose fur

Then I turned to my bag of quills.

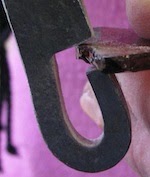
I hadn't realized that very little of the quill is hollow. I cut one at the far end only to discover I wasn't putting a stick into it. The picture is not ideal, but the quill wasn't hollow at this point.


I found it a bit confusing at this point. He calls for a thin wooden stick, tapered, to be inserted and tied onto the quill and for my purposes I don't know why that is necessary. Despite Cennini's directions being in the glass section of Il Libro dell'Arte I wonder if the brushes he describe aren't used for larger paintings? He does describe a variety of sizes. Without having compared every feather type personally (vulture and dove, for example), some of the larger end seem larger than the modern brush sizes commonly recommended for glass painting by the "modern masters" and I notice a great deal of variety between the goose quills I have. At the smaller end, the feather itself seems to be a perfectly fine "stick." Their only obvious drawback is that the opposite end won't hold up for stickwork, scratching out paint as needed.

As he described, I tied the waxed silk thread on and used it in a form of lashing. He calls for a "knot" and not a "lashing" and I don't know if they would have even recognized a difference. As an Eagle Scout I know them as two different things and I was initially tempted to use a form of lashing. In hindsight, what I was going to do would have poorly secured the fur to the quill. Instead I tied a simple square knot to start. From the written description I thought the idea was to tie the thread so tightly it constricted the quill. That was NOT happening. I didn't test the strength of the thread but I attempted to tie the knot directly over the quill first and pulled tight. I got nowhere [Edit: see "**" below]. I then rechecked the text, wondering if the quills were supposed to be soaked to make them workable, but that wasn't indicated. I tried again, tying the knot directly over the fur and tightly binding the hairs into a bundle. I then wrapped my way down the bundle, over the point of the end of the quill and down. I ended with a simple overhand knot, thinking again a little wax to seal it "makes sense." I didn't use that, however, as it wasn't called for.

My first quill brush, with Cennini's book as a backdrop.


I only have a few quills that may be large enough to accommodate both the fur and a tapered stick handle. For the purposes of this small brush I have left the quill as the handle. I think the next one, which will be larger and use the tails of the other two, will have the wooden handle. Likely so too will the hog-bristle brush I plan to make tomorrow as well.

An edit will come later this month (March 2014) about the results of painting with this brush.

Thoughts and Lessons Learned (in no particular order or relevance):

  • I'm not sure why waxed silk thread was called for. Silk is known to be strong and the waxing didn't add any perceptible quality to it, though admittedly I'm not sure I've ever handled plain silk thread. It didn't seem stiffer than cotton thread. I may try to give it hell and see what happens. [**Edit: I took a length of the thread, tied an overhand knot and put it on the quill. I wrapped the long ends over my fingers and pulled slowly, but with all my might. The thread snapped LONG before the quill gave any sign of contracting neatly. I tried again with a doubled length of thread, same result. Trying on the thinnest portion did nothing that would secure bristles either]
  • What is the impact of North American vs European quills? Are geese significantly different?
  • Man, a little glue would do wonders. I'm not sure why they wouldn't have used that. Maybe glue was not as available or affordable in period? Might be another question for a C&I laurel. Mostly irrelevant, but a quick review of an episode of How It's Made shows that modern brushes are not held in using compression, but glue... at least, the large ones. [Edit: The knowledgeable and skilled Estelle de la Mer has informed me that period glues would likely have become weak quickly due to constant exposure to moisure.
  • I'm curious how the quills compare. I can't find European turtle dove feathers available, but NorAm mourning doves are. I've ordered a few. I suspect the quills will be significantly smaller. The average length of the two breeds is only a few centimeters different.
  • I will be interested to see how the hog bristle brushes turn out. The C&I Laurel friend I spoke to suggested that they are very suitable for glass painting (contrary to a remark I made) because they should apply the paint thick enough to conceal the brush strokes. To be honest I initially thought that was incorrect because we use a badger blender to smooth out those strokes. Then I realized, none of the period sources I've ever seen describe a badger blender. That is what I get for doubting her :)
*Cennini listed specifics and alternatives. Silk thread is one he specifically mentioned. "or any other good wood" is also given as an option so I didn't go to a length to acquire a specific wood.