Showing posts with label silver stain. Show all posts

Friday, February 3, 2017

Silver Stain Experiments Part 2

[Edit: No idea what this is still a draft. Publishing now, three years later!]

Phase 2 has actually turned up some successful blends!

Detailed below are tests I ran with pure silver, silver nitrate, copper sulfate, and silver sulfate as the active compounds. Binders included a new, "brand name" red ochre, yellow ochre, gum arabic, and brick dust. After doing a round of tests I came up with several new ideas, particularly where pure silver and copper sulfate are used, and had to do another set.

Some notes on the binders themselves:

Silver dust and gum arabic - Almost indistinguishable from pure silver dust. Film formed, gum arabic undoubtedly. Weird to see it plainly, but interesting to get a clear visual of the effects of gum arabic. I've noticed recently, when I added too much water to some matting paint, how there is a "thickness" to the water, as you stir the paint you can see some of the unmixed water jiggle and repel the paint until you force it to mix. I've not tried mixing paint with no gum arabic but I think I'll try it to confirm my thought that that is also the GA (rather than the paint). That may be what they refer to as "body" when talking about other binders mixed with water.

Brick dust - Probably needs to be even finer. Works well. I ground pot shards with a pestle and mortar, but I think I need to get it even finer. I'd love to get my hands on a ball mill to do this, but it's not in any shape period.

And a correction from "Part 1" in that I realized I'm slightly blind. As I began to tag and catalog my samples, I almost threw out a few pieces that didn't take. As I was getting ready to toss them I realized that the copper sulfate chip DID stain:

On two slides it's almost imperceptible (this picture above is not a very good example, but it shows up at least) but it was actually there. Because of this realization I tried a stronger mix of copper sulfate for this round. As detailed below in Sample 6 it didn't work out, but I have a good idea why not (temperature).


The stain samples prepared and drying:


A closer shot of the samples:


Silver nitrate and gum arabic made an incredibly pretty, deep orange color while drying. This continued to intensify as it dried, becoming a dark red


The samples after firing:

Sample 1 - Pure silver dust and gum arabic (1:6). Oddly enough, this did nothing. I suspect it takes a higher temperature to work. I know from Leap's book that pure silver leaf will leave a dark amber stain on glass, I can't imagine the powder not having the same effect. Later review of Leap's book indicated he fired his pure-silver tests at 1500°, a full 500° hotter than I did. I know what to try next, and may throw some more of sample 6 in with it.

Sample 2 - Silver nitrate and red ochre (this time from Vallejo pigments). Clear proof that there was an issue with the red ochre I bought before, this name brand sample didn't have the same hazy effect that the first sample left behind, ruining what results there might have been. Part of the sample is a little darker, but I suspect that may be related to how I used it (no blending, possibly imperfectly even surface allowing oxygen to get in, etc) rather than the mix. I consider this one a success!

Sample 3 - Silver nitrate and terracotta dust. A bit of research indicated most of the bricks before the 14th century would have been very similar to what we call terracotta. I bought a small planting pot, smashed it, and started grinding it into a powder. It seems to work quite well, actually. The one downside was that it must be ground very finely. Small "pinholes" are visible in the sample (close-up later in the post). This was caused by less well ground (larger) bits of the terracotta that inhibited the even spread of the silver nitrate. This also left behind a bit of hazing on the edge, but I again suspect it has to do with handling rather than the compound. I also consider this one a success.

Sample 4 - Silver nitrate and gum arabic. Oddly, this didn't work at all. No effect was left behind. Isenberg's book has a chapter on painting and a page on silver stain. It mentions that the "Reddish material" has minerals which pull the sodium out of the glass and allow the silver in. I find it hard to believe, but at the moment have no other explanation for this chip's complete lack of stain. The silver sulfate and copper sulfate chips, both mixed with gum arabic, had visible staining. Silver nitrate did not. The same book also states that "other silver salts" (presumably silver sulfate) are added to stain powders because nitrate is unpredictable and melts unevenly. I haven't seen that to be the case, yet, either.

Sample 5 - Silver nitrate and yellow ochre (vallejo). This mixture was twice as strong as the same combination I tested in "phase 1" and likewise is a much stronger color. This is 1 part silver nitrate to 3 parts ochre.

Sample 6 - Copper sulfate and gum arabic - This is a 1:6 strength mixture, better than what I had previously made. I discovered, just before pitching the last test chip, that copper sulfate actually had stained the glass. The compound was in such a small quantity that it was in the form of tiny specks. I mixed this more strongly and used more of it to try and get a more visible effect. I didn't get it, though again I got visible effects. I think this merits a higher temperature or longer soaking period.

Sample 7 - Silver dust and gum arabic, 1500°
Sample 8 - Silver foil pure, 1500°
Sample 9 - Copper sulfate and gum arabic, 1500°


A close-up of sample 5


 A close-up of sample 3


All 13 test chips I've fired so far

Lesson's Learned

Future Plans ("Phase 3")

Sunday, September 27, 2015

Archery Tournament Trophy (A Day of Archery, 2015)

I decided to try working on my painting skills. I grabbed a tiny brush meant for painting minis, and built a small wooden bridge to rest my hand. I got to work:


 It's hard to tell how the lines are doing while tracing, at least for me. Once I removed the original image I was very, VERY pleased with the line work. It has a somewhat irregular, rustic feel but I was ok with that.

Matting, to remove highlights


Matting cleaned up


I'm particularly pleased with this leg. The knee was a great accident.


After silver staining. I also wanted to stain the rock at the archer's feet, for some kind of vertical balance, but I tried three times and it blended "away" from the line too much. I moved on without it.


The finished and framed piece, at the archery field.


Thursday, August 28, 2014

Book Hoard: Stained Glass Primer Volumes 1 and 2

While teaching "Glass Cutting - All Levels" with Molly at Pennsic, she mentioned two books she recommends for new glass artists, different from the one I usually recommend. I grabbed them this week to look over.

Stained Glass Primer (Vol 1): The Basic Skills
Peter Mollica
4/5
All around an excellent book, in my opinion. As Molly had told our students, it IS dated. He described, at depth, the creation of leaded panels, and gives an overview of copper foil technique. His glossary is worth a read in it's own right. The dated portions are the tools and chemistry (well, and the typewritten text); he uses tools that are very traditional, and I think most people learning today use newer versions (lead cutting pliers instead of a lead knife, for example). He also references oleic acid as a flux, which works fine but is greasy and hard to clean up. More modern chemistry provides fluxes that are much easier to clean. The technique was all good, however! I appreciate the fact that he prefaces the book with "There are many alternatives, but this is what works for me" in essence. A skinny but packed book, I read it in under an hour.


Stained Glass Primer (Vol. 2): Advanced Skills and Annotated Bibliography
Peter Mollica
4/5
Also an excellent book. This one covers painting and staining heavily (Me being me, I noticed his date for the discovery of silver stain was 100+ years late. Research is a LOT easier for me today than it was for him in the 70s though!). He covers actually installing your window, which I've never seen before and, frankly, has always been a mystery for me. I've never tried to fit an existing embrasure because I had no idea how to do it and no one seems to cover it. He also discusses reinforcing, saddlebars, etc that is of definite interest to a SCAdian glassworker. He gives a recipe for easel wax but I'm not going anywhere near it...

He has some interesting books in his bibliography. I look forward to ordering some of them, too! Have to make Amazon Prime worth it.

Wednesday, April 30, 2014

No more BS about Pb

A bit of an "aside." I've had the unpleasant experience of listening to several heated discussions on Facebook about lead safety. I've had multiple intelligent friends speak to me about concerns about their glasswork and non-glass friends worried about my health and safety.

I am impressionable when it comes to medical matters, so a heated discussion on a wonderful Facebook group for glass artists left me a bit paranoid. At the time I spent a bit of money to build a better ventilation system, researched lead safety extensively, and discussed it with everyone I knew. I had been made to believe, however briefly, that my love of glass was killing all of my loved ones who set foot in my house.

Not happening. Today's post is going to cover some lead safety "Fact or Crap" items.

The big Fact: The significant threat is ingestion, not inhalation.

Think of lead much like water. Is ice contributing to the humidity of your air (are you inhaling it?) Yes, technically. A tiny portion of the ice can sublimate straight into water vapor. But it's so little it's insignificant. Is liquid water sitting in a glass adding to your humidity? Yes, very slowly. If you want to raise the humidity in a room, how do you do it? A pot of boiling water works much better. Lead is little different... actually, MORE difficult than water.

Lead melts at 621.43 (°F). At that point it's equivalent to liquid water (as far as our inhalation of it). Lead doesn't boil until 3180 °F. We are quickly melting it and it cools and resolidifies. You aren't at a risk of inhaling lead fumes unless you are smelting it. If you solder and you see fumes/smoke fly in the air that is not solder, that is flux. Flux is often resin based (check your bottle and your MSDS) and/or a chemical formula that will not poison you. You CAN irritate your sinuses and lungs, and cough for a day or two (at least the brand I use, Old Masters, can't poison me unless I confuse it's blue color for Romulan Ale and take a swig).

Now, as you work on it you get it all over your hands. That's why you must wash your hands immediately after working. You want to get lead poisoning, lick your fingers. I've cast lead into cames now, it didn't generate fumes (and incidentally my stovetop could barely melt the lead).

Some of us paint, and we use lead-based paints. Like a lampworker or glassblower using frit/powder, it is more of a concern. However, the powdered pigment isn't like flour and so on. It's a "heavy" powder, filled with glass fluxes and heavy minerals. While it is a powder, I've noticed minimal "floating dust" when I opened the sealed jar. I take a palette knife's worth and put on a palette with no noticeable cloud. Of course then we promptly mix it with binders and mediums and such and it's never again in dust form. I do own a mask that I can wear if I am concerned (and I use it for my silver stain mixes, which DO like to make dust clouds). Otherwise... as rare as I actually mix a fresh batch of paint... it's not a serious concern for me.

Now, for three "real world" arguments. The owner of the local glass shop, a woman who is as generous with her knowledge as she is skilled at a workbench, discussed lead safety with me a few months ago after a Facebook thread made me panicky and I bought ducting to build a ventilation rig. She informed me that in 30+ years of doing stained glass she has occasionally had a blood lead level test run, and it has never shown anything abnormal.

In the aforementioned FB thread, the owner of a professional studio mentioned she had an employee once who did test for elevated lead. Turned out he hadn't been changing out of his work clothes at work, and had been driving home in them after being around soldering and lead 8 hours a day. THAT lead to an "elevated" level of blood lead! Not lead poisoning.

So, in an effort to maybe put this to bed, both for others and for my own paranoia, I just went to the hardware store three hours ago and bought a big pack of lead tests. Instant Lead Testing ("If it's red, There's lead!" it says. "If it's red, you dead!" I thought) by Lead Check. A pack of plastic tubes with two ampules you crush to mix the solution. You then apply it to surfaces and If It's Red(tm) You're gonna have a bad time, mmkay?

Test 1 - My computer desk. I do my pattern work on my computer and have been known to absentmindedly click print while working on glass. Oh, I also eat here and spend 10-16 hours a day near this desk. You can imagine why it was site number 1. I dumped yellow testing liquid all over the desk, several important keys, and the left button of my mouse. Not a hint of red.

Test 2 - Other common surfaces in my house. After all, as some people keep trying to say to us, lead vapors are floating around to kill us and everyone we love. My couch? Nope. My dining room table? Nope. If you are unfamiliar with my home, it's an open floor plan, no walls. Couch armrest, kitchen counter, all ok.

Test 3 - What the heck, is this thing on? Solder and my (paint-encrusted) palette knife. Both came back brilliant dark red (oddly the solder took several seconds and the palette knife's droplets turned red practically as soon as I thought about applying). I guess they work!

Test 4 - My workbench. I tried the surface of my primary work bench. Yellow!
Test 5 - The plastic top of my lightbox. Tried several spots, all yellow!
Test 6 - The side of a plastic storage thing bordering my solder area. Yellow! This is about 1' from my soldering area.
Test 7 - The wall bordering my solder area. Permanent yellow staining of the paint, a foot from my soldering area.

Test 8 - The steel coil holder for my soldering iron, less than 1" away from the hot tip of the iron when it's on. YELLOW.
Test 9 - Dragging the thing through every cranny and coil above the soldering iron in that holder. FINALLY got some pink.... at the opening of the holder, which I hit every time I put the iron away without looking right at it. I guess that makes sense.


Edit: Test 10 - Tested the ceiling above my soldering area in several spots on a 2' line above the bench. YELLOW.

So, in short: Don't smelt lead from ore, don't lick your fingers, don't confuse your gin and tonic with your flux and wash your hands, kids!

Tuesday, March 25, 2014

Period Silver Stain Trials

Finally, an update on my silver stain research. I'm entering this into A&S, and have enough information and pictures to make a worthwhile blog post.

I'll skip the long train of how I found my sources, following reference to reference until I narrowed them down. I found seven recipes for silver stains. One ended up being a poor translation of another. One was incredibly complicated and is intended as a ceramics glaze; while the recipe would probably work on glass, I really can't call it a glass stain.

The recipes and my notes follow:

Mappae Clavicula
This is a compilation of recipes for a tremendous variety of crafts. The core of the text was compiled around 600 AD. Versions have been found from 800, 1130s, 1200s, and a variety of fragments of the text.

Amongst other recipes for colored glasses is this:

"For staining [glass] sapphire, silver and sulphur should be set on fire together; afterwards from 2 pounds of clear mosaic glass and 3 ounces of the above-mentioned sapphire cooked together, you will make jacinth stones."

I initially missed this when I read my copy of Mappae. I didn't want blue glass. It wasn't until I read "European Stained Glass Around 1300 - The Introduction of Silver Stain" in which Meredith Lillich explains that in period people knew "sapphires" to be both blue and orange varieties of the same stone. Although this appears to be a recipe for a pot metal orange she provides a compelling argument that it may have been used as a stain, and that the furnaces available at the time were capable of reaching the appropriate temperatures.

I purchased a few small vials of powdered silver for my experiments. I also bought 2 pounds of 99.5% pure sulfur prills (pellets), apparently used for livestock typically. I ground the sulfur to a powder in my mortar and pestle. In the absence of proportions, I mixed them equally.

I wasn't sure what "set on fire together" should mean precisely. I put them in a pan I was planning on throwing away anyway, and set them on low heat. Holy cow! The sulfur melted quickly and the whole thing became a black tar-like mess. I couldn't figure out precisely how I was to use it, and decided I would grind it back into a powder.

I believe the sulfur and silver are reacting to create silver sulfate. I'm not sure what reaction would happen alone that couldn't happen in the kiln, so I went ahead and made a second sample that would not be heated until in the kiln.

In my previous post I tested pure silver sulfate and the effects were apparent, but not this strong!

Slide 1: "cooked" MC formula. Slide 2: "raw" MC formula. Fired to 1000 degrees.

A closeup of the "raw" MC formula, 1000 degrees. 

This formula created a beautiful orange stain, exactly as the formula described and Lillich predicted. I believe the irregular coloring has more to do with my crude preparation than with the mix itself.

The Lapidario of Alponse the Wise (Alphonso X) of Spain

The Lapidario is the text by which Lillich (and Ken Leap, possibly from her research) speculate that silver stain truly became known in the West. It is a text describing stones and astrological properties. 

The stone "Ecce" is given it's own section. Lillich explains the text in depth. An English translation of the recipe:

"The treatise also describes a stone called ecce, which was used in glassmaking, saying that it was found in Spain, “in a mountain, not of great height, which overlooks the town of Arraca, and is called Secludes. And the stone is of an intense black colour, spotted with yellow drops. It is shiny and porous, brittle, and of light weight …; and if it be ground up with honey, and the glass be smeared with it and submitted to the fire, it dyes the glass of a beautiful gold colour, and makes it stronger than it was before, so that it does not melt so readily, or snap asunder with such ease.”

The Arts and Crafts of Older Spain, Volume II (of 3), by Leonard Williams

Lillich explains that the names given are incorrect and explains this is actually the city Guadalajara. She identifies the stone as silver antimony sulfide, or pyrargyrite (Ag3SbS3). This is known as red silver.

Further research on my part shows that this is not the exclusive mineral source. Proustite is a mineral that is visually indistinguishable from pyrarygyrite. They are isomorphous, meaning they have the same crystalline structure and essential composition. The difference is that where pyrargyrite has antimony, proustite has arsenic. The test needed to distinguish the two substances was not developed until 200 years post period. 

I purchased samples of both rocks. Further research and pleading from friends turned up that antimony is much safer to powder and heat up. Even though I was using tiny amounts of the mineral and it was VERY unlikely to be dangerous, I used proustite for my test.


I smashed the red crystals into what I initially thought was a sufficient amount of good size. The powder stained quite well, but my sample is very small and isn't visually impressive:

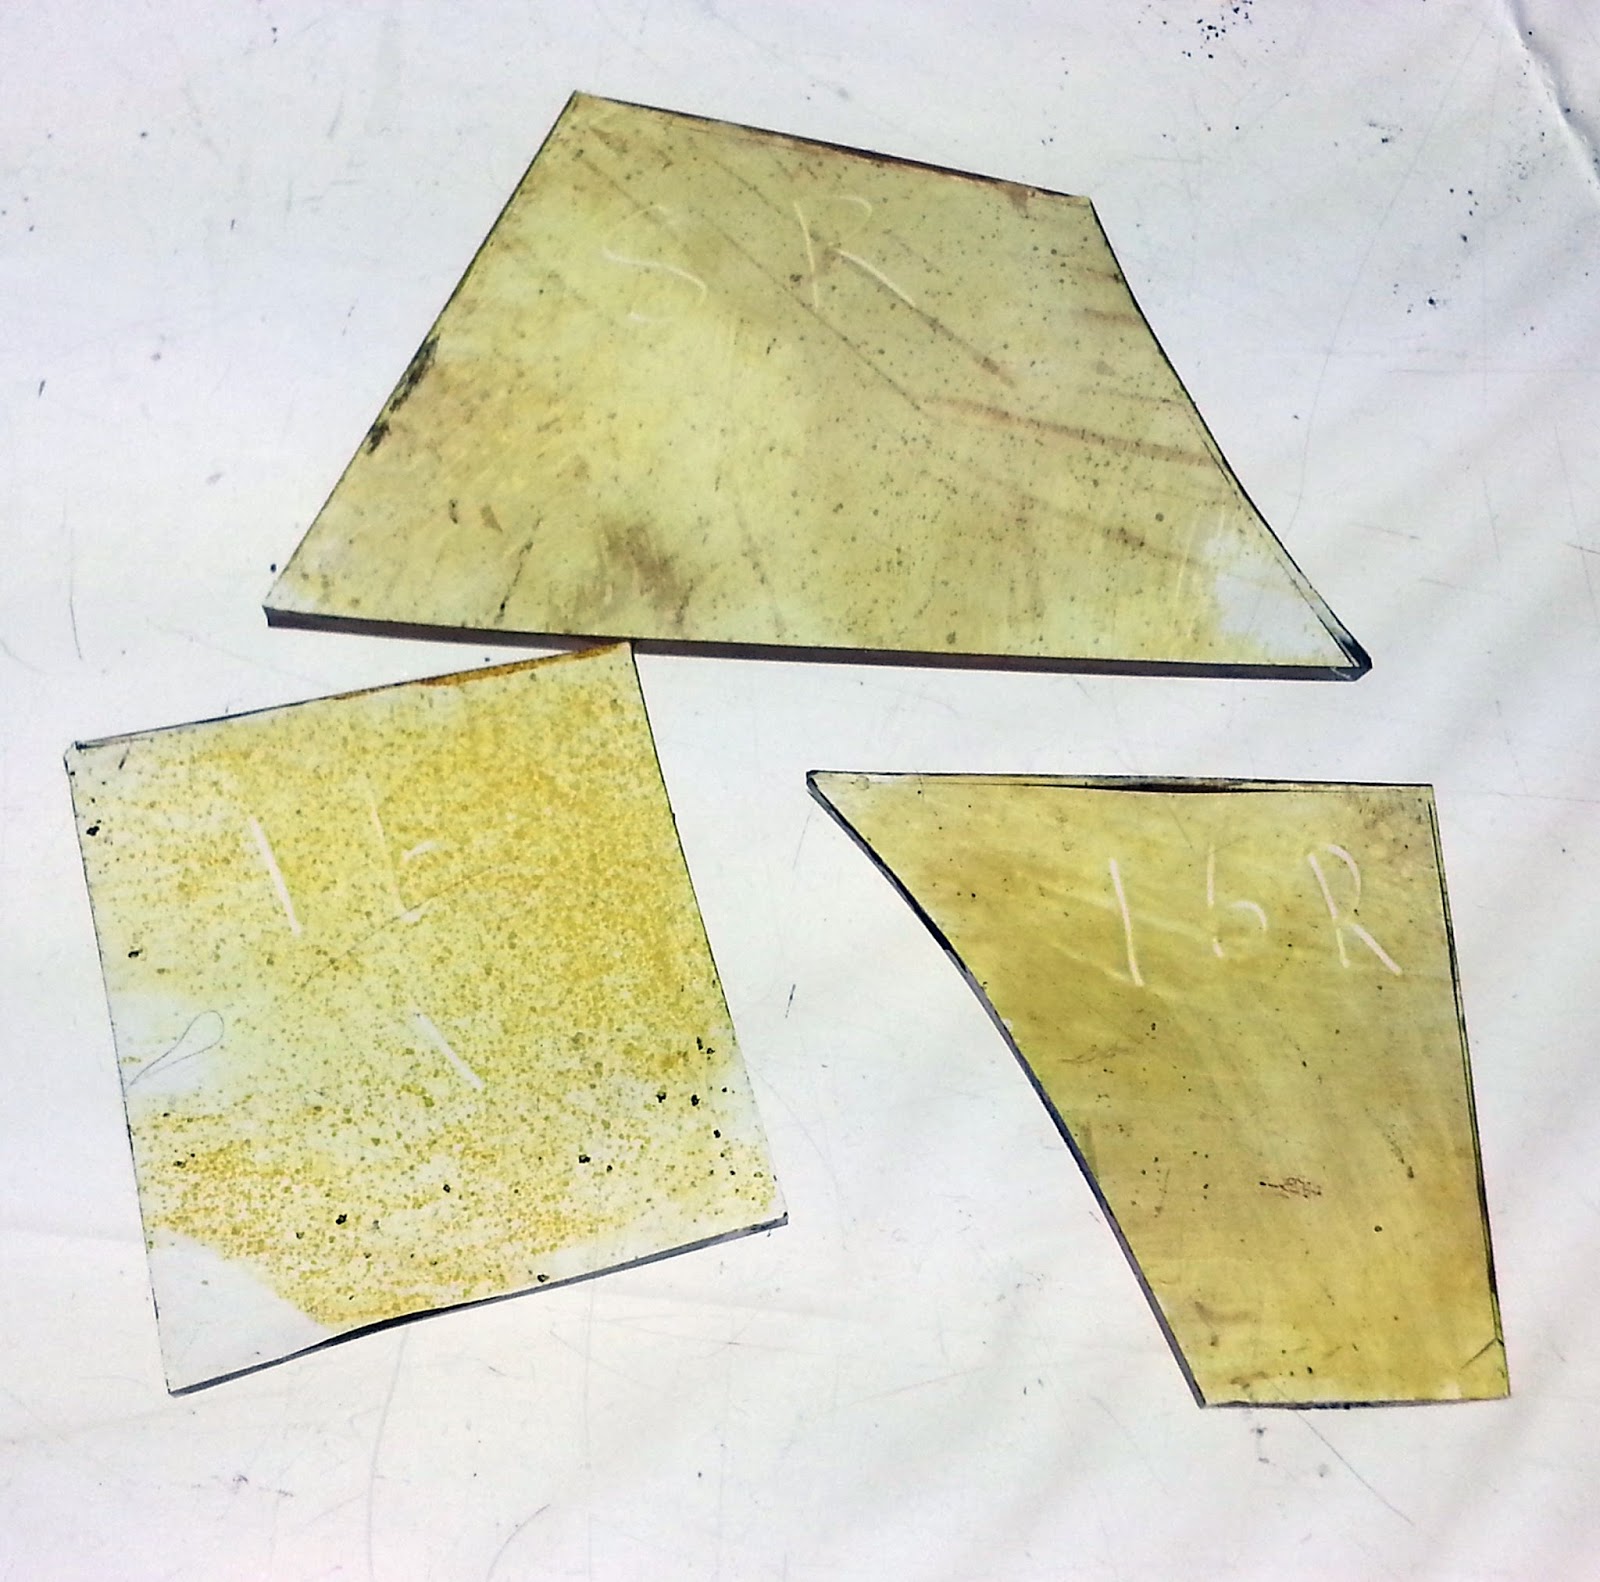
Slide 3: Lapidario formula featuring proustite, fired to 1000 degrees. 

The Marciana Manuscript

This painting text comes from the early to mid 1500s. The formula given is:

"If you wish to make a beautiful yellow colour which may penetrate into the glass, grind some silver leaf with a little honey and water, that it may hold together; then wash it in water with the fingers until it is well purified, in the same manner as powdered gold is treated. Distemper this silver with gum water made with soft water, dry it, then heat it in a furnace as before, and it will become very beautiful, &c"

I took silver leaf and tore it up a bit before starting to grind it in my mortar and pestle. My initial thought is that the honey is there to help give the leaf some body and grind it up. It makes sense that you would then wash it off. I used gum arabic and water to apply it to the slide.

This stain ended up being tricky, and I tried it three times. It's a known fact that stain takes differently with different glasses, and that you have to experiment with each glass you want to use. I also knew from Leap's book that pure silver requires higher temperatures than silver salts 

The initial slide with this formula, fired to 1000, came back clean. The silver did nothing.

Slide 4: Marciana formula, fired to 1000. Aka, clean slide!

I had similar difficulties with the last two slides, and decided to try again. I fired them to 1300 degrees.

Left slide: Marciana formula at 1300 degrees....

It definitely stained, you can see the pretty yellow color in the picture (that's pure silver leaf underneath, not gold leaf). Unfortunately at this temperature the silver leaf fused to the glass and I haven't been able to remove it. So, I tried again, at 1150 degrees. The silver didn't stain.

I may continue to try and get this to work with this glass. It MAY end up being that this glass gets soft at too low a temperature for any other result, however. I won't waste much more of my materials chasing it down with this particular glass, though. It appears when it works it will be a beautiful pale yellow.

Brussels
The Brussels manuscript is actually slightly post-period, from the early 1600s. It was very easy, however, so I included it:

""The yellow is made with silver, copper, and a little yellow ochre, the whole ground up together on a plate of copper.""

Hah. Easy. HAHAHA. Foolish glass geek.

This formula is the second slide in both of the two preceding pictures. You will notice it makes a beautiful color as well. Unfortunately the minerals fused to the glass in most of my samples. 

Bottom center: Brussels at 1150. Above it, Brussels at 1300.

Center/slide 5: Brussels at 1000. Clearly staining the edges!

This stain is proven to work, but I'm having difficulty getting the mineral residue to come off the glass. Lower temperatures for longer time makes sense, seems to be how it would have been done in period (they certainly didn't have an electronic controller on an electric kiln!) That should allow the stain to set in the glass without the glass getting to tack fusing temperatures.

Antonio da Pisa
I was able to try this recipe thanks to Mistress Kirsten allowing me to use her copy of the expensive and rare French translation (there is no English translation of the original Italian). My translation:

"The yellow color

To get the yellow color, take the fine filings of money, that is to say, the Venetian money and grind this on a chip of porphyry, until it is fluid like water, then when you begin to paint, apply it on the white glass where you want it to become yellow, and mix it in the least with the liquid egg tempera."

I collect ancient Roman coins. There are millions of them out there, they are very common. Many of them are little better than slugs, and if they hadn't been found with better samples you would not know they once had any value. They are also very cheap. On that basis I initially considered buying a Venetian coin and grinding it as described. Then I discovered Venetian coins are not as common as the Roman ones, and if I were to do as planned I would likely be destroying a valuable historical artifact. Instead I researched further and discovered that a common coin had a composition of 1 part silver to 6-to-9-parts copper. I mixed a batch of stain in those proportions, and gathered egg yolk for tempera. I've never worked with tempera before, it makes a wonderful paint/stain base:

A great many painters are smacking themselves and saying "Well, duh." 

Some Venetian coins had much higher ratios of silver. Because of that I doped the mix with more silver. In the picture above the top compound has considerably more silver than the one below. Knowing that the visual differences might not be as obvious after firing, I wrote an "L" ("lower") into the original mix.

Unfortunately, as with the preceding two, I had issues getting this to fire at a temperature that didn't fuse the metals to the glass. BUT, it DID stain!

Ignore the thermal shock cracks, I got impatient around 400 degrees.. Slide on the right, da Pisa at 1150


Questions/Lessons Learned

My six samples, drying before being fired.

All six of the period formulas worked as a silver stain. This particular glass made it difficult to show some of them in all of their glory, however. Interestingly, to me, the earlier formulas (Lapidario, Mappae) were the easiest. They make or use silver salts which, if I understand Leap correctly, fire at a lower temperature. The later period mixes (Marciana, Brussels, da Pisa) rely on actual metallic silver and are more complicated. However, I think they give a yellow color instead of the orange/ambers of the earlier mixes. 

Many glass recipes I see suggest a methodology of long slow cooking which would be impractical in my electric kiln but make sense in a clay and wood-fired oven. That may help the later period formulas. I would love to try some test slides if I ever have access to, or make, a period glass kiln. Something I am mildly considering at Pennsic this year.

For sake of discussion, the "mistaken" formula comes from Timothy Husband's book cited in my previous post on silver stain. It seems clear to me he is quoting a translation of the Lapidario, but identifies the wrong rock:

"antimony sulfide and silver in a liquid suspension, diluted 1 part to 6-10 parts by some form of clay (brick dust, ochres, etc)"

Antimony sulfide is called stibnite. I believe this has been confused with pyrargyrite, however Husband didn't cite that passage or explain the source. Later in the chapter, however, he cites a translation of the Lapidario, suggesting that might be the source of his recipe as well. Antimony sulfide and silver is, essentially, pyrargyrite. I purchased a sample of stibite initially, before I read Lillich's text on silver stain. I may still try "stibnite and silver" in the future.

It may be after A&S season, but I am going to continue to work on these formulas, probably with other glasses and temperatures and with finer grinding of some of the minerals. I am pleased to know, however, that I have an immediately workable orange stain that is BEAUTIFUL and that I can give out at my silver stain class at Pennsic this year. 

Sunday, March 9, 2014

Making a hogs-bristle brush

I had some trouble when I tried making my first minever paint brush.

I researched it a bit more and discovered two things: The first set of quills I had purchased were mutants and had been cut short by the vendor and second, people working with quills usually soak them to make them softer.

Now, to be clear, in the directions on p. 40 of my copy of Cennini he doesn't say to soak the quills. His thread may have been stronger, his quills thinner-walled, or many other things. However it looks like fly-fishers and others using these quills today frequently soak them, so I gave that a try. That made the quills softer and suddenly able to take a bit of a "squeeze" that broke my thread with the first try. Not wanting to waste my precious supplies of stoat tails, I decided to try again using hogs-bristle (the other type of brush described by Cennini).


A feather from the first set (top) next to one from the second set. I hadn't realized the feather should have this chiseled tip the top one has. Comparatively the second set also have much more usable quill.

The process is pretty much exactly as described in the previous post. I have a pack of hog-bristle brushes that I bought for scrubs in my glass painting. I took an exceptionally large one for which I had a duplicate and took it apart to claim the bristles.

An interesting observation, the bristles have a "root" end. I'm not sure it's biolgically/cosmetically a "root" but one end will be thicker and stronger on a good bristle (I also don't know why these are bristles and not hairs, but I'm a glazier-turned-brushmaker not a biologist... yet). I found it important to try and line up the bristles so I knew which end was the thicker/stronger end.

I took my soaked quill and trimmed the very end off. I used a tapered stick "of other good wood" as Cennini calls for, and shoved the quill on as far as possible. I then grabbed a clump of bristles and shoved them in the other end. Cennini described sticking bristles/hairs in individually until you can't get any more of them. This is where it became a LOT easier to know which was the strong end, as that end wiggles in more easily.

This also makes some sense for retention purposes, I think. The portion of the bristles that is at the opening of the quill is somewhat thinner. You can sneak more bristles in. If you were to try and pull the bristles collectively, however, I think the thicker ends would jam and not come out in a clump.

I tied a knot with my waxed silk thread and could see the quill took the pressure a little better. My thread snapped, after I had gotten the knot tied. On a lark, taking a note from an old martial arts movie that "wet silk never breaks" (not true!) I soaked the thread. I continued tying another knot and doing a little wrapping (that was probably too loose). Its difficult to do all this with only two hands! Same thread, knot, wrapping on the other end to secure it to the stick.


The brush was a little wild, and as Cennini told me to, I trimmed it down a bit:


As a final step I dunked it back into water and made some practice strokes. I gently tried pulling the bristles and none came out. I wouldn't give them a serious tug, but I think this is a practical brush made exactly to the primary source's standards. We will see if it holds up to vitreous paint and silver stain, however!

When I teach my silver stain glass this Pennsic, I hope to give out small vials of stain. I'd love to make a dozen of these to give out too. It didn't take too long in the scheme of things and would be a nice touch!

Lessons Learned:

Hog bristles are much more clingy than stoat fur. When I dunked my bunches of bristles in water they immediately made a tight cluster. I had to work the fur with my fingers for a while to try and make a cohesive bundle. I think in general bristle brushes are going to be easier to make than stoat.

I'm not sure why soaking a hard protein-based quill makes it softer, but don't our fingernails do the same after a hot soak in the tub? Might be something to investigate when bored later.

I have typed and said Cennini's name so much lately I'm starting to feel bad that I have no idea how to pronounce it. Keh-nee-nee? Cheh-nee-nee? I highly doubt it's Sen-nee-nee. I'll need to figure that out before I teach and have to say it several times.

Monday, March 3, 2014

Making a "minever" brush, pt. 1

[Edit, 3/3 12:45 PM. I just got a package that changed some of my information on this brush. Details tonight! In short, the quills I had were chopped before I bought them. Also, the squeezing of quills! Edit-of-the-Edit, the update can be found here!]

This was a bit off-putting.

I am, mundanely, a computer geek. I don't hunt for my food. I have two cats and a beagle. I like animals. I'm not naive, I know what tasty bacon comes from and I appreciate when hunter friends share venison with me. But I know I probably couldn't field dress an animal unless my survival depended on it. So, this ended up being a slight bit sad for me, handling little furry tails.

Cennini is the earliest primary source I have on actually making paintbrushes. Consulting a friendly C&I Laurel suggested this was fine. She said that before him no one probably thought writing it down was necessary because of the normal apprenticeship process.

The short version he detailed is you use minever fur and a tapered stick and join them using a quill as the ferrule. They are joined by some thread lashing.

He wrote that you must take the tails of minever (stoats) and remove the ends, which have the longest fur. Then take the fur from the middle. Wet them in a goblet of clean water and press them into bunches. Then you take quills of varying sizes, vulture, goose, dove, and so on. Put a bunch of fur of the appropriate size into the quill, and wrap it with silk thread*. Then, insert a small stick of wood* into the other end, and again lash it on with the thread. This yields a minever brush that he says can be trimmed into a number of shapes appropriate for different jobs.

I had to research what a minever was to understand it was a stoat. I managed to find someone selling stoat tails online, who had three of them. None of the pictures of stoats or tails had a scale reference, so I pictured something large, like a ferret or racoon tail. I was a bit surprised:

Stoat tails in a pretty standard adult male hand.

Now I see why he talked about using the tails of five or six of them for a large brush.... Heralds, do these look familiar at all? The winter coat of the stoat is called ermine. I can't imagine how many tails it took to trim a garment!

With only three tails to work with, I won't be making any large brushes. I also won't be painting any large murals, so I don't feel particularly worried about this. I plucked out a lot of the fur from the ends and middle of one tail. Wet the fur and pressed it into clumps on my table.

 Loose fur

Then I turned to my bag of quills.

I hadn't realized that very little of the quill is hollow. I cut one at the far end only to discover I wasn't putting a stick into it. The picture is not ideal, but the quill wasn't hollow at this point.


I found it a bit confusing at this point. He calls for a thin wooden stick, tapered, to be inserted and tied onto the quill and for my purposes I don't know why that is necessary. Despite Cennini's directions being in the glass section of Il Libro dell'Arte I wonder if the brushes he describe aren't used for larger paintings? He does describe a variety of sizes. Without having compared every feather type personally (vulture and dove, for example), some of the larger end seem larger than the modern brush sizes commonly recommended for glass painting by the "modern masters" and I notice a great deal of variety between the goose quills I have. At the smaller end, the feather itself seems to be a perfectly fine "stick." Their only obvious drawback is that the opposite end won't hold up for stickwork, scratching out paint as needed.

As he described, I tied the waxed silk thread on and used it in a form of lashing. He calls for a "knot" and not a "lashing" and I don't know if they would have even recognized a difference. As an Eagle Scout I know them as two different things and I was initially tempted to use a form of lashing. In hindsight, what I was going to do would have poorly secured the fur to the quill. Instead I tied a simple square knot to start. From the written description I thought the idea was to tie the thread so tightly it constricted the quill. That was NOT happening. I didn't test the strength of the thread but I attempted to tie the knot directly over the quill first and pulled tight. I got nowhere [Edit: see "**" below]. I then rechecked the text, wondering if the quills were supposed to be soaked to make them workable, but that wasn't indicated. I tried again, tying the knot directly over the fur and tightly binding the hairs into a bundle. I then wrapped my way down the bundle, over the point of the end of the quill and down. I ended with a simple overhand knot, thinking again a little wax to seal it "makes sense." I didn't use that, however, as it wasn't called for.

My first quill brush, with Cennini's book as a backdrop.


I only have a few quills that may be large enough to accommodate both the fur and a tapered stick handle. For the purposes of this small brush I have left the quill as the handle. I think the next one, which will be larger and use the tails of the other two, will have the wooden handle. Likely so too will the hog-bristle brush I plan to make tomorrow as well.

An edit will come later this month (March 2014) about the results of painting with this brush.

Thoughts and Lessons Learned (in no particular order or relevance):

  • I'm not sure why waxed silk thread was called for. Silk is known to be strong and the waxing didn't add any perceptible quality to it, though admittedly I'm not sure I've ever handled plain silk thread. It didn't seem stiffer than cotton thread. I may try to give it hell and see what happens. [**Edit: I took a length of the thread, tied an overhand knot and put it on the quill. I wrapped the long ends over my fingers and pulled slowly, but with all my might. The thread snapped LONG before the quill gave any sign of contracting neatly. I tried again with a doubled length of thread, same result. Trying on the thinnest portion did nothing that would secure bristles either]
  • What is the impact of North American vs European quills? Are geese significantly different?
  • Man, a little glue would do wonders. I'm not sure why they wouldn't have used that. Maybe glue was not as available or affordable in period? Might be another question for a C&I laurel. Mostly irrelevant, but a quick review of an episode of How It's Made shows that modern brushes are not held in using compression, but glue... at least, the large ones. [Edit: The knowledgeable and skilled Estelle de la Mer has informed me that period glues would likely have become weak quickly due to constant exposure to moisure.
  • I'm curious how the quills compare. I can't find European turtle dove feathers available, but NorAm mourning doves are. I've ordered a few. I suspect the quills will be significantly smaller. The average length of the two breeds is only a few centimeters different.
  • I will be interested to see how the hog bristle brushes turn out. The C&I Laurel friend I spoke to suggested that they are very suitable for glass painting (contrary to a remark I made) because they should apply the paint thick enough to conceal the brush strokes. To be honest I initially thought that was incorrect because we use a badger blender to smooth out those strokes. Then I realized, none of the period sources I've ever seen describe a badger blender. That is what I get for doubting her :)
*Cennini listed specifics and alternatives. Silk thread is one he specifically mentioned. "or any other good wood" is also given as an option so I didn't go to a length to acquire a specific wood.

Sunday, September 15, 2013

A little update, work continues

Work continues on silver stain. It's been my primary focus for the past few weeks. Tonight, after my birthday dinner, I started grinding some brick dust to try as a binder:


A little research suggests that before the 14th century almost all brick was what we'd call terracotta. I bought a small terracotta pot, set it on a ledge, and aimed a laser pointer at it. Gravity and a cat with a hair trigger gave me shards to grind into my dust. For testing my various binders (What was mostly planned to be "part 1"), I've been using silver nitrate and each binder (1:6). For what I meant to be my compound tests ("part 2") I've been using gum arabic. I've found no indication that it is a period binder for this purpose, but I trust it not to fire onto the surface of the glass.

Copper Sulfate is supposed to give an amber color to the glass. It's proving difficult and I think I will have to try it at a higher temperature. Silver sulfate and silver nitrate are both working as expected. I've purchased some "name brand" red ochre to try again; the 'generic' stuff I used before appears to be way off and now the line between phases of my project is quite blurred.

I'm presently up to four binders, three of which are mentioned in the period formula, and four compounds, one of which is mentioned in the period formula. Once I have some confidence in the binders I will smash up the materials needed to actually try the period recipe.

Tuesday, August 27, 2013

Silver Stain Experiments pt 1

I've become fixated with the idea of making and controlling my own silver stain. I particularly want to do it following a period recipe to enter into A&S.

[Edit 9/6/13: I'd like to clarify that this "Phase 1" is about finding the right binder. Phase 2, detailed at the end but not well explained, is about finding the right silver and copper compounds to create various colors. Phase 3 is actually using the period recipe.]

After a considerable bit of research I've only been able to track down one recipe, which calls for antimony sulfide and silver in a liquid suspension, diluted 1 part to 6-10 parts by some form of clay (brick dust, ochres, etc). [This book, p. 11]. Antimony sulfide, also called stibnite, is not especially safe since it's an antimony compound. The recipe from that book, incidentally, supposedly comes from one (of many) versions of the Lapidario of Alphonso X (Alphonso the Wise). I've gotten a copy of that specific version, but no English translation is available and automated translations were insufficient for me to pick out the recipe. Fortunately somewhere in my skull is 4 years of Spanish. I am working on translating the document and finding the recipe from this primary source.

A brief aside, I was pointed at the Mappae Clavicula by Master Ali. A latin copy was available and, working with a dictionary, I thought I found another recipe. After I ordered an English translation I discovered a slight error with a big impact. It is still an awesome text with amazing recipes, including many glass-related ones!

Modern silver stain is made using silver nitrate, silver sulfate or (for dark stains) copper sulfate [This book by J. Kenneth Leap] in a binder (various clays or gums will work). For the first round of experimentation I decided to try and make a half-way modern stain to start with, eliminating the least safe part until a later time when I can use a fume hood and better safety equipment.

My "round one" experiment was to use purchased silver nitrate (AgNO3), combined with the binder in the period formula at a ratio from the period formula. I bought two grams of reagent grade silver nitrate online for $10 including shipping [Here]. I ordered yellow and red ochre pigments online as well [Yellow: $6 inc. shipping for 30 grams by Vallejo Pigments; Red: $15 inc shipping for one half-pound of unspecified provenance].

The first step was grinding the silver nitrate. It comes in small crystals in a small amber vial (it's a photosensitive compound, I understand). I used a mortar and pestle, as well as a small disposable brush:


Crushcrushcrush isn't just a song by Paramore...

2 grams yielded considerably more powder than I expected. I used a small-unit digital scale to measure out 2 1-gram portions of the silver. Unfortunately it didn't go further, so I divided each portion into quarters as best I could visually. My primary goal with this was to see if it would even work or if I were missing some other "secret sauce". I then used the scale to measure out grams of ochre to reach the desired strengths. In the spirit of what I'm doing, I mixed the ochre and silver nitrate in a handmade bowl Master Ali ("Arab boy") generously gave me at Pennsic when I went to pick his brain about alchemical implements:


An academic article I found indicated that red and yellow ochres should inhibit the silver ion exchange (for more info, see the Leap book referenced above) that makes silver stain work. The reason is that the iron content in red ochre affects the transfer [Academic article can be found here. For details from it, email me at Brynn dot Herleifsson at gmail dot com]. The article, and several others, was kindly provided by a friend with access to those digital libraries, saving me the considerable expense.

I mixed three batches. The first was mistakenly made weak, 1 part AgNO3 to 16 parts yellow ochre. I decided to keep it and do a 1:16 batch using red ochre. I then made a 1:10 batch using red:


It was a little uncomfortable making lines of various white and colored powders on a digital scale. Just sayin'....

I made small batches of each mix in my usual method (with oil, as I learned from these gentlemen). For a "proper" batch I'd mix it with sandalwood amyris oil, and dilute it for use with lavender. Lavender is lighter, and I wanted the chips to dry faster, so I only used that.

The 1/16 yellow ochre blend, mixed with lavender oil 

The 1/16 red ochre blend, with lavender oil. The 1/10 mix is identical, no photo taken

I put some stain on three test chips and blended them as I normally would. The 1/10 red mix was difficult to blend, but I attribute that to being slightly too dry. My purpose was to see if it would even work, so I moved ahead rather than keep blending (Preparing the chips, the mixing, staining, and starting the kiln were done in the span of my lunch break from work). I used a glass that I've stained before, so I knew it would take without difficulty unless the batch were bad.

The three test chips on whitening, before firing

I fired them at my usual silver stain schedule (also one provided by Williams and Byrne, available here but to summarize.... 212°/hour to 212°, 570°/hour to 1000).

Hours later, I was rewarded:

I've color-corrected this picture to the best of my abilities. The top and right chips are a little too muddy yet, in reality they are just a bit more darker/amber than the other. They also have some residue, detailed below

[Edit 8/28 Afternoon: I have a stronger test chip in the kiln right now, but while walking past my lightbox I realized that a picture taken from an angle shows the color differences between the red and yellow mixes a little better. It's still not perfect, my eyes pick up more differences than my camera:

]

The un-stained portions are from imprecise handling during blending. The bottom two are the 1/16 mixes, the top the 1/10. Right and top are red ochre, left is yellow ochre.

[Edit 8/29] I decided I needed to try a stronger mix right away, my excitement was distracting. I mixed a 1:6 strength batch with red ochre and fired it today. Unfortunately the results were very disappointing. The chip appears to have even more nasty residue than the others. I'm not sure if red ochre itself makes for a poor binder, or if my particular supplier is unsuitable. I wish I had powder left so that I could try a stronger batch with the yellow ochre, which is the only test chip with no residue. The new one is bottom-right in this picture:


The stain is not brown or amber, there is a hazy shmutz all over the glass, and very little yellow tone. This is the same glass as the other three pieces.]

Lessons Learned and Observations

  • I have one glass palette I use for small batches, tests, etc. I opted for it because I never bothered to sand it. This makes for easier ("more scientific") clean-up and, I hoped, less contamination between mixes. Unfortunately it also made it very difficult to get a good mix!
  • I find alchemy texts and experiments FREAKING COOL. That counts as a lesson learned.
  • I do notice a difference between the red and yellow ochre mixes, however I'm not convinced it isn't due to handling issues. It looks like I got more of the red mixes onto their test pieces, they were quite thick compared to the yellow after I blended them. I will need to try and find a very controlled way to compare them to see if the journal article pans out in practice. This is especially visible in the graininess of the yellow sample above (bottom/left).
  • Red ochre powder is a beautiful substance and a wonderful pigment. It's also a beast to clean up. The chips have what I'd almost swear is fired-in ochre on their surfaces, making them look less clean when viewed close up. I'm not sure what the source is. The palette I used last had "red for flesh" mixed on it, and I had just cleaned it off before mixing the silver stain. The residue looks convincingly like RfF:

A shot of the 1/10 red ochre test chip using reflected light to show the residue on the "inside" (unstained) surface


Next steps

Phase 2 (Sept/Oct) -
  • Try a 1:6 ratio mixture with yellow and red ochres, the strong end of the range given above.
  • Try to keep it very clean and even to compare the effects of the binders
  • Try mixtures with silver sulfate, copper sulfate, and mixes of the three compounds.
  • Try mixtures including brick dust, gamboge gum, and other substances as the binder.

Phase 3 (Nov/Dec) -
  • Try the actual period recipe, involving stibnite (already acquired) and silver
  • Try a syncretic recipe involving a period recipe for nitric acid (aqua fortis) and silver, resulting in a modern formulation made using entirely period techniques (Assuming that they didn't use that same formula, but there doesn't appear to be any existing document indicating as such. The (al)chemical knowledge was completely in place to do so, however). Maybe Roana can use some of the acid for her book binding as well?

Tuesday, August 13, 2013

#4: The Arms of the Barony of White Waters

So, since I've decided to combine my long-term goal of doing the Baronial arms of all 19 Midrealm baronies, and competing in A&S 50, I need to get a move on. This weekend is Swine and Roses, hosted by the Barony of the White Waters. Rather than do the devices in order of precedence, I've always planned on doing them in order of proximity to me. Having the closest ties to White Waters, and the first "deadline", they are first up.

Azure, a mullet of four points within a laurel wreath Or, a chief wavy argent.
 
Cutting the mask was a major pain in the fingers. I cut the escutcheon from blue-flashed-on-clear, and applied three stripes of Gorilla duct tape. A very thin coating of wood glue, and then my paper copy of the baronial arms. After it dried, I attacked it with an X-acto knife. Peeling the pieces out was a challenge, and today I ordered a set of steel dental picks.

Four pictures taken while removing the mask:


The acid etching began last night [8/13/13]. The panel needs to be completed for submission at S&R on the 17th.

[Edit 8/19/13]

The acid etching wasn't going quite fast enough. I realized the panel would probably be done Sunday, but I needed it Friday evening to stain. Mistress Kirsten shared with me a copy of her documentation a few years ago, and while I don't have her sources, yet, I know from her that abrasion is a period way to remove flashed glass. I've manually removed flashed glass with an "engraving point" for my dremel, and it's a very slow process. It's not well-suited for the space I needed to clear and the time I had. I did this with my dremel on a low speed:


It's very pretty, and the glass was left with a nice texture. I started to silver stain it, and had a problem. Due to the detail level it became very hard to remove excess stain after I blended it. It would probably have been much easier if I had waited until the stain dried and could have scratched it out. I was working with Q-tips, paper tower etc. and found it almost impossible. I removed too much frequently, trying to clean up the stem:


It was 3 AM and I needed sleep, so I gave up on the idea of entering it at Swine and Roses. On my drive there the idea occurred to me to fire it in three stages. Once for the mullet (4-pointed star) and the stem of the laurel wreath, once for half of the leaves, and once for the other half of the leaves. This would let me have plenty of wiggle room to clean up and detail the stain after blending. I'm not sure whether the results would be better when compared to waiting for it to dry and scraping it with a stick. That may require some experimentation.

[Edit 6/12/14]
Yow! I never updated this post. Here is the roundel >.<