Monday, April 22, 2013

Paint chips

Paint chip samples, to go into the binder. Before firing they always look lifeless and like drawing pastels, in reflected light:


Pre-firing, in transmitted light. I sketched little phrases on them for contrast. The samples are intentionally not blended even:


This was a very beneficial test, in the end, because the transparent green enamel I thought I bought was opaque. That project got sidelined for a bit as I try to decide whether to try it with enamels, or flashed glass. I don't want a leadline where... ah, but that's another post for another day. Three new colors coming this week to test as well.

Thursday, April 18, 2013

Pennsic Lantern

I want a nice-looking light source for Pennsic, although I'm going to keep it modern and electric. I have a thing for lanterns, but the two hanging for decoration around the house (with LED candles) aren't suitable for.... <evil Russian accent> Enhancement....</accent>. This made for a nice, and quick project.

I was passing through Menards and found these decorative lamps on sale, with a hinged door, for $10. I opened it up and immediately saw the four glass panes are held in by bendable metal tabs.


I took it home and bent out the tabs to discover that the pieces are also held in place by a strip of foam adhesive, kind of like what you'd mount a poster with (if you had no regard for the quality of the posters). My plan was to replace the two side panes with Midrealm Pales and the door (back) with mirror, to channel the light out the front. So, with that in mind, I took my glass cutter, scored horizontal lines across them, and smashed out the glass.

I used pliers to remove the shards and the foam adhesive strips. Then I cut strips of glue chip glass. I don't want lead lines impeding the light coming out of the lanterns, so I laid them on my lightbox and used a clear silicon adhesive/sealant to glue them together.


I cut a piece of mirror for the door and glued it into place, along with squares for the inside ceiling and floor, again to channel the light.

Once the silicone sealant was solid enough, I popped the panes into the sides and closed up all the tabs. Lantern done! I intend to take a bright flashlight and put it in the lantern, possibly rigging a switch near the handle on top.


Wednesday, April 17, 2013

Test Binder

A helpful idea to share quickly. I've begun accumulating test pieces and samples to the point where I can't keep them straight anymore. Enter my test binder:


I took an old binder, and filled it with baseball card sleeves you can get at your local hobby shop or Wal-Mart (try the hobby shop first). Each glass chip goes into a sleeve, with the back of a piece of 3x5 notecard. This gives an even white surface for viewing the samples, and the lined side of the cards has notes on what the sample is. Right now I have a description and, when relevant, firing schedule for each piece recorded.

Memorial Disks

After several weeks of not being able to stand at my work benches (sprained ankle followed by gout attack), and with very few weeks until my last option to enter MK A&S for the year, it's time to put the hammer down and get serious, or I won't be entering this year at all.

It took a dozen tests to get everything settled, to get a method to create two armorial disks. The disks are bearing the arms of a departed friend, blazoned "Azure, a chevron argent, overall a Latin cross Or." One will go into a panel for A&S. One will be attached to the lid of the handmade box containing his ashes.

I ordered two square feet of flashed glass, blue-on-clear. I also had a small (7x7") scrap of blue I found on a fluke at a local shop that doesn't normally carry flashed. I placed that into my Morton circle cutter and popped out a perfect disk. For the second disk, I cut one of the new sheets up. Popped it into my circle cutter, and met with heartbreaking (and expensive) disaster as the disk mis-cut. A second square became two more half-circles. Then a third. I blew through $75 worth of glass in an hour. I decided to forgo the fancy circle cutter and do it slowly, by hand and grinder.


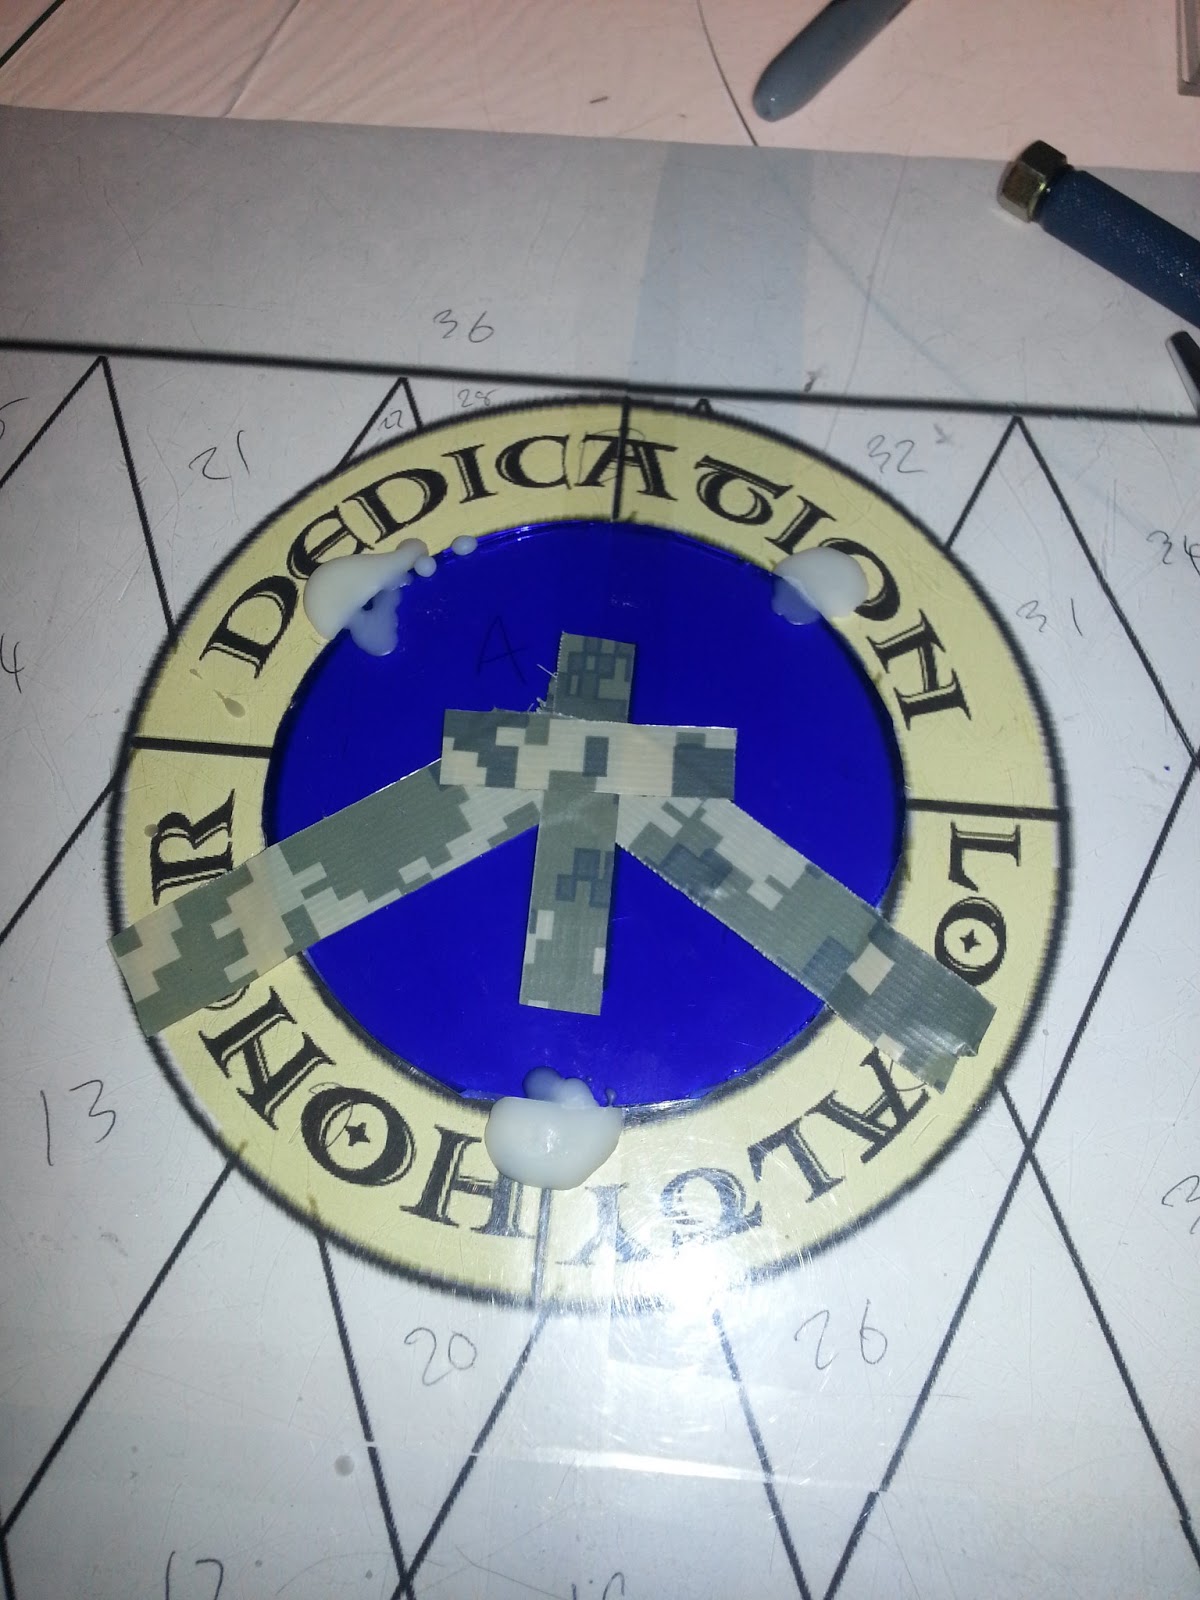
Not too bad. Then, on to the acid etching. Resists/masks have been a problem for me, after several tests. Duct tape (fuzzy edge), contact paper (very fuzzy edge), and a resist gel were tried and found problematic. Most of the "tape" solutions I was trying are actually suggested for sandblasting flashed glass, not acid-etching it. I tried them anyway, because I had no better ideas and I'm not yet equipped for sandblasting. The gel was especially tricky because after I smeared a coat on the glass, I needed a "resist resist" to keep clear my target pattern. I laid down duct tape first, and lifted it to try and leave behind what I needed, but the lines weren't clear enough for my taste.


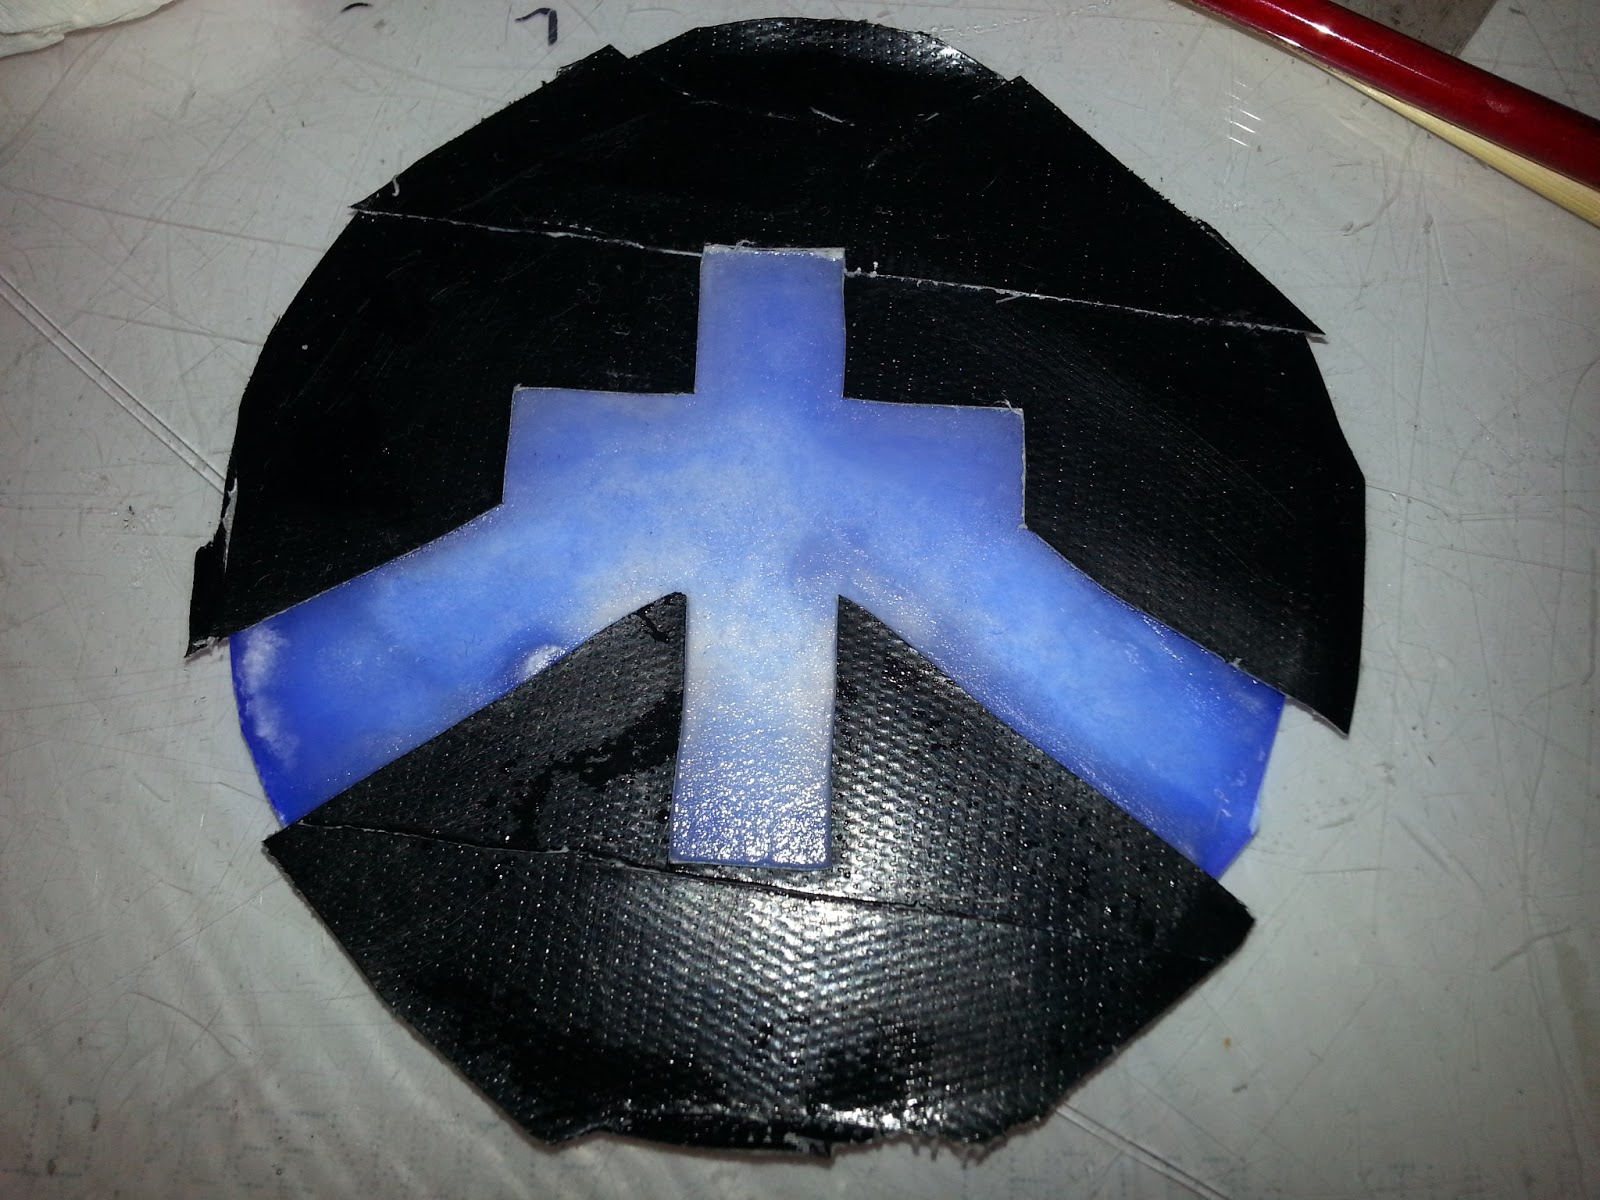
I ended up going back to duct tape, figuring I'd rather have a roundel with slightly fuzzy edges than none at all. I wanted a wider roll, however, to avoid issues where two pieces of tape match. A trip to the hardware store turned up a 4" wide roll of Gorilla-brand tape... and this stuff is mighty. I put a strip of Gorilla tape mostly across where the design will be, and two extra strips above and beneath. I then covered the gaps with two more thin strips, trying to get as much coverage as possible. I put a copy of the roundel on top with white glue, attacked it with an X-Acto knife, and got something workable.


Then, began the cycles of acid etching cream. Five of them, I do believe, in all. Sitting on scrap mirror for protective purposes:


After two coats, I believe:


Three coats:

 
After four:
 

I was shocked but pleased with the result. I gave it a fifth coat to clear up the edges. The glass is a lot clearer than I expected, more so than with sandblasting. While washing it in the end the water filled in the pits and made it completely clear.

The Gorilla tape worked far, far better than I had hoped. It stood up to wirebrushing to remove dried coats of acid etch, and kept the fine points intact. Here is a shot on top of my ancient crown template, for visibility.


Now knowing how to get the silver stain to work, I applied my stain and fired it.


I am exceedingly pleased with the result!!! Now, to get it into a panel....


Monday, April 1, 2013

Painting Practice Pieces


I made a quick practice piece to check my firing schedules and the paints:


For some reason (other than being an SCA herald?) I like to use an Ancient Crown for my practice pieces. I mixed a small batch of Reusche 1059 tracing black, and a matting color of about 50/50 Reusche 1220 A gray green and 1110 bistre brown #7. I did the matte, waited, very roughly traced the ancient crown, waited. I removed the matte from about 2/3 of the crown and did a thin highlight around the entire border. Fired it, applied the silver stain, tried a new blender, and fired. This shot shows some of the matting coming off:


 I'm using Reusche 1384 silver stain, Yellow #3. I had a previously mixed batch. I took a small bit, diluted with lavendar oil, and diluted it too much. Then I kept putzing about with it, and it was too dry when I went to hit it with the blender. Eh, I thought, it's a test piece. Fired it again:


 I am not unhappy with it. The matting is too light, the lines irregular and poorly traced (but it was a test piece), and the silver stain uneven. The only actual problem I've noticed is metalling where my silver stain is thicker. It happened once before, as well:


I checked my firing schedule (I'm using schedules from Williams & Byrne), and I noticed that my current schedule only goes to 1040°. Metallizing, as I understand it, normally happens when you fire too hot. RP 1384/Silver Stain, Yellow #3 has a listed firing range of 1050-1080. I'm going to do two more tests this week, firing to 1020° (20° below my current schedule) and 1060° (20° above) to see what the effects are. Viewed directly on the stain is pretty, this may be something I end up having to live with, because I can't image 30 degrees below the listed range is going to make it better, and going higher should make it worse if this is actually metallizing.

(Update, 4/17/13)

I ended up with interesting results. The test piece fired to 1060°, just inside of the manufacturer's listed range, turned out horrifically bad. I went ahead and fired it on a chip with a blue enamel I have plans for, and this was my result:


Horrible metalizing, "yellow mother-of-pearl" as I expected from Williams & Byrne's books, their description of overfired silver stain. It looks horrible in both reflected and transmitted light.

The chip fired to 1020° was relatively the same as 1040°:


Looking straight through it, its functional, but there are some off spots and in reflected light you can see its still not right. Thirty degrees beneath the listed range, and it's still not right? I started to suspect I was firing for too long, then, because surely it couldn't be too hot...

Checked Elskus, seeing what he had to say on the matter. Silver stain, according to him, has a functional range of 950° to 1050°! I'm still on the high end, according to him. Ok, one more chip, at 1000° then.


This picture doesn't do it justice. Beautiful and quite even. I stared at the chip for several minutes, held it up to various lights, placed it on my lightbox. I put it by my computer and picked it up ever few minutes for an hour, staring. 1000° it is, then, and that temperature has been working great for me. As the masters wrote and write, experiment and experiment some more...

Monday, February 11, 2013

Running in Circles

A quick observation on cutting circles. After you cut the circle with the tool or method of your choice, and you put in your relief cuts.... tap between the relief cuts. Half the time when I start tapping on a relief cut, I get a piece bisected in two. That does make the rest of the run easier, heh...

Arrows pointing at the successful score, unlike its twin on the bench, bisected. Red dot where I started tapping. Fortunately this is a fusing test.

Friday, February 8, 2013

Same bowls, different

A friend requested some bowls in her household colors, black and gold. With only a week before Val Day I went looking on Delphi's website (they are nearby and ship fast) and found a 3mm black and a 2mm black w/ iridescent gold:

(Unfortunately I think it looks better in photos than reality)

Glass used (Product ID's provided by Delphi, may be proprietary):
B010130 Bullseye Stiff Black 90 COE
B010058 Bullseye Black Opal Gold Iridized Thin
B110038 Bullseye Tekta Clear 3mm - 90 COE

I'm not precisely sure why the gold-on-black is a millimeter thinner, something to investigate later (UPDATE: It's intended for jewelry making, and not general fusing). The blanks are in the kiln fusing at the moment:


I will say, they do look pretty! Unfortunately it ended in complete failure. The blanks looked very pretty, the gold really comes out after fusing, as shown below. I don't normally crash cool, and as such it can take a lot of hours for a blank to cool down. Because I wanted to slump this right away, once the blank was 250-300° or so, I took it out and put it under hot water, which I then slowly changed to cool water, bringing it to room temperature in about a minute. I've done this several times with success. This time, however, I think the plate was hotter than the temperature on the kiln let on; as soon as it hit the hot water a significant crack appeared, between the color and clear layers:


Regardless, I tried slumping it. The results were.... ugly. The bowl was misshapen, cracked, and uneven. It had over-slumped, as well, and almost pooled in the bottom of the mold:


I didn't know if this was some result of the cracking or not, so I tried the second blank I prepared. It was not quite as ugly, but still misshapen. Here they are with comparison to a well-formed Midrealm bowl:


 After staring at a bowl for a long time, I believe this is because of the 2mm gold glass. I suspect it got hotter faster, being thinner, and started to slump prematurely. I slumped another midrealm bowl afterwards just for comparison and it came out fine, with the mold in the exact same place, so I don't believe its a kiln issue. Of course, now I found Delphi has the same glass in 3mm, so there is only one way to find out...